Useful information of this course

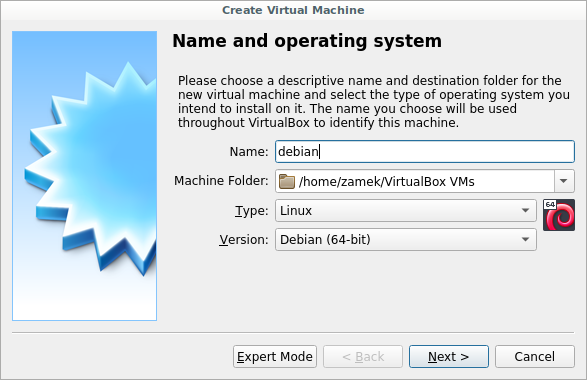
Create a new VirtualBox VM
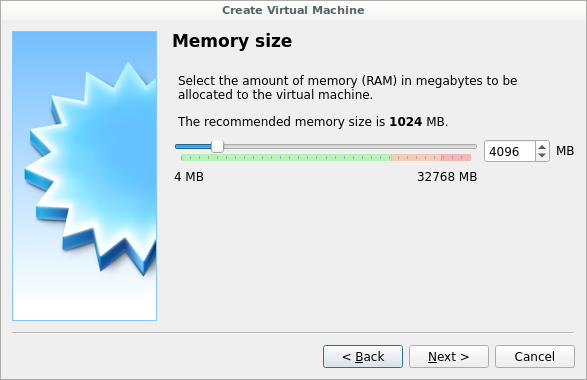
Assign memory for VM. Recommended size is 2Gb
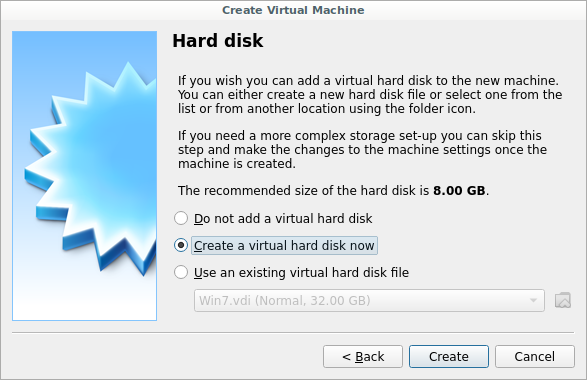
Create hard disk.
Recommended size is 8Gb, file type is VDI (VirtualBox Disk Image), Storage on physical hard disk is Dinamically allocated
Insert the Debian install DVD image into the VM storage system
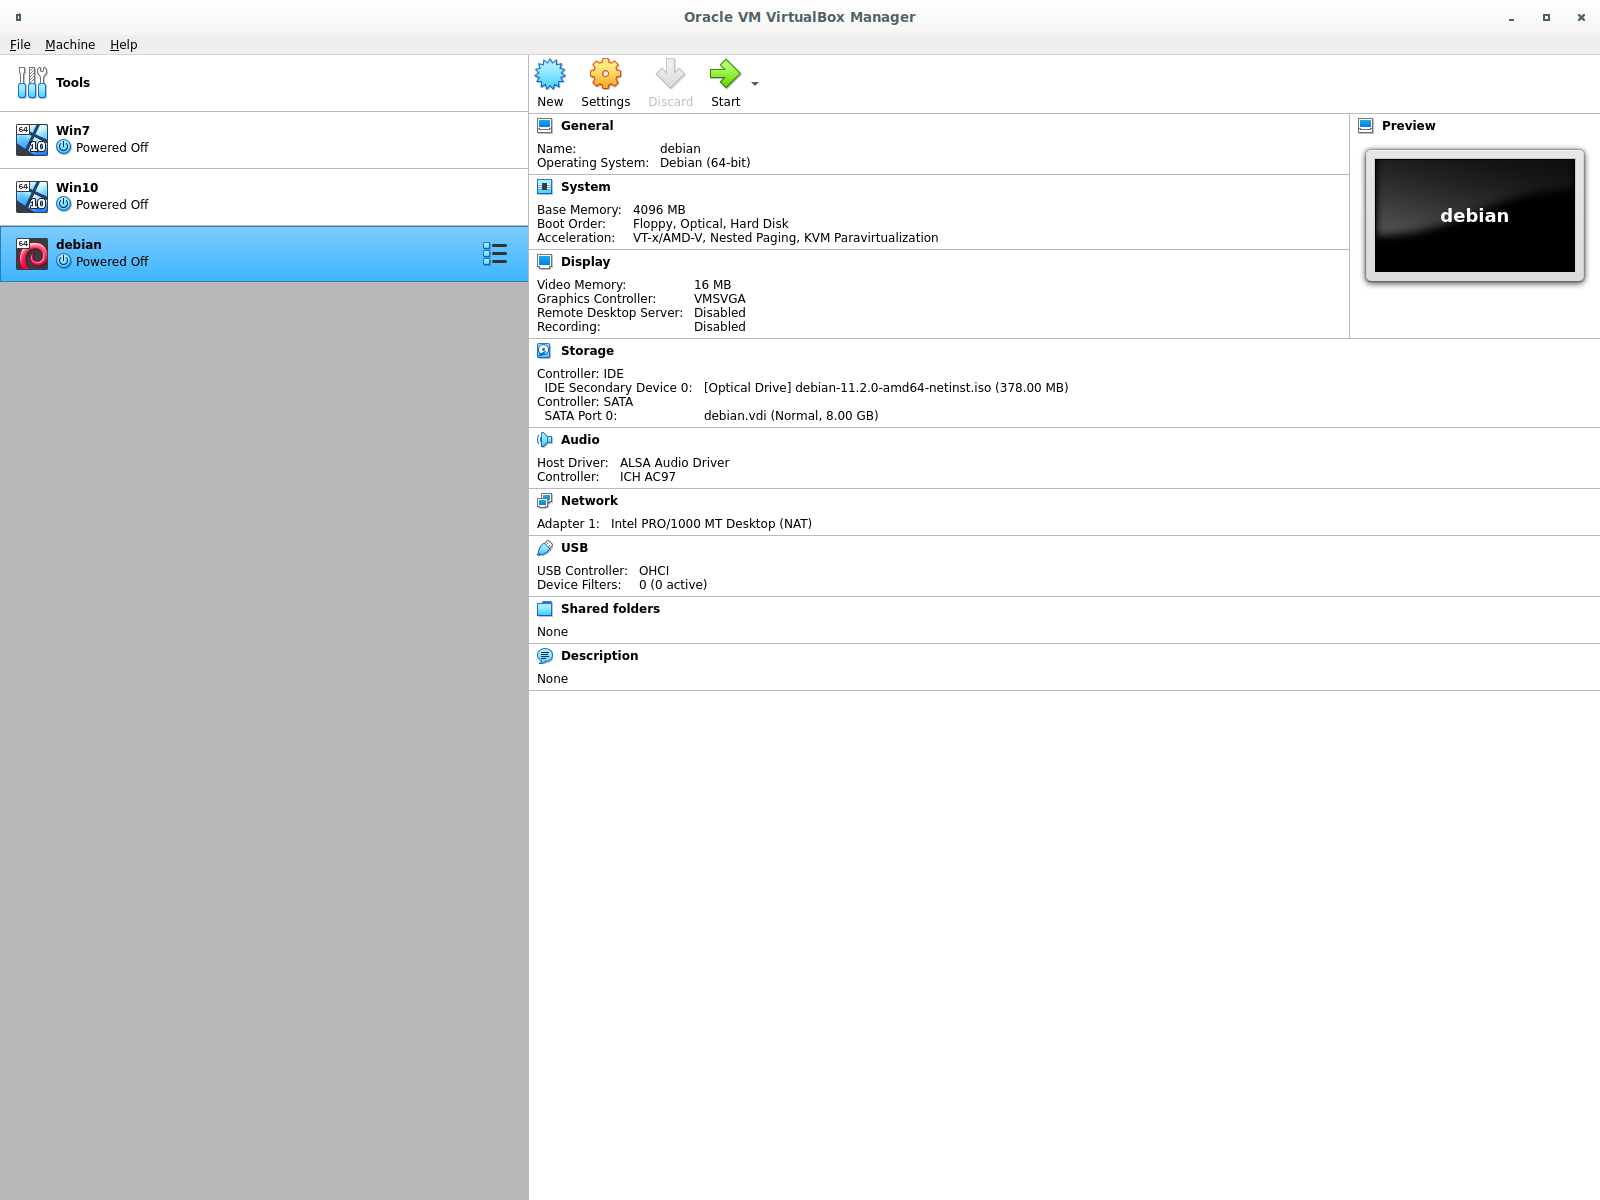
Select the Debian 8 virtual machine in the left side of the VirtualBox window and then click on the Settings icon in the VirtualBox menu bar.
In the screen that appears, click on the Storage icon. You will see items called IDE Controller and SATA Controller in the left side of the screen. It shows it is connected to an empty optical disk. We need to configure it so the network installer ISO disk image appears where the empty disk is now. This is just like inserting a CD or DVD installer disk into a normal host machine.
DVD’s and CD’s are attached to the IDE Controller in a real computer so click on the Empty optical disk icon below the IDE Controller. Then, click on the optical disk icon on the far right side of the window next to the CD/DVD Drive field.
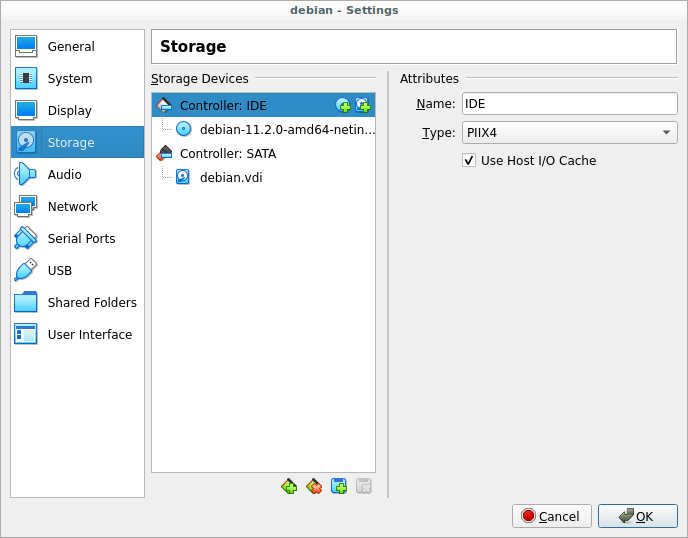
Now you can see that the network install ISO image is configured for the Debian 8 VM. We should be able to start it now and it will boot from the image and the software on the disk image will start the Debian Linux installation process in the virtual machine.
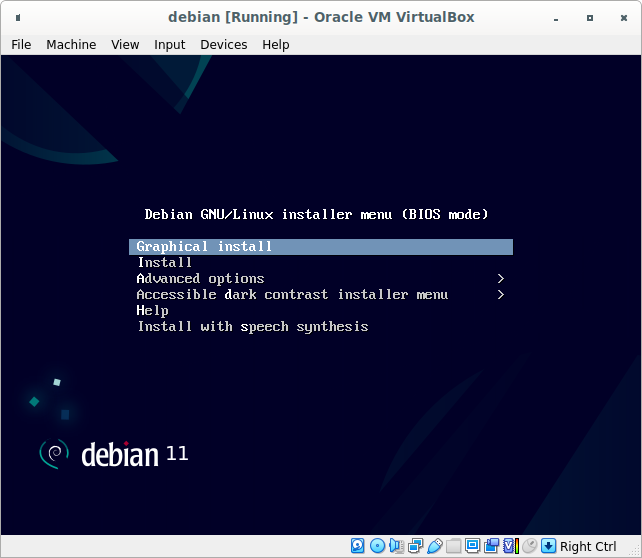
Start this new virtual machine
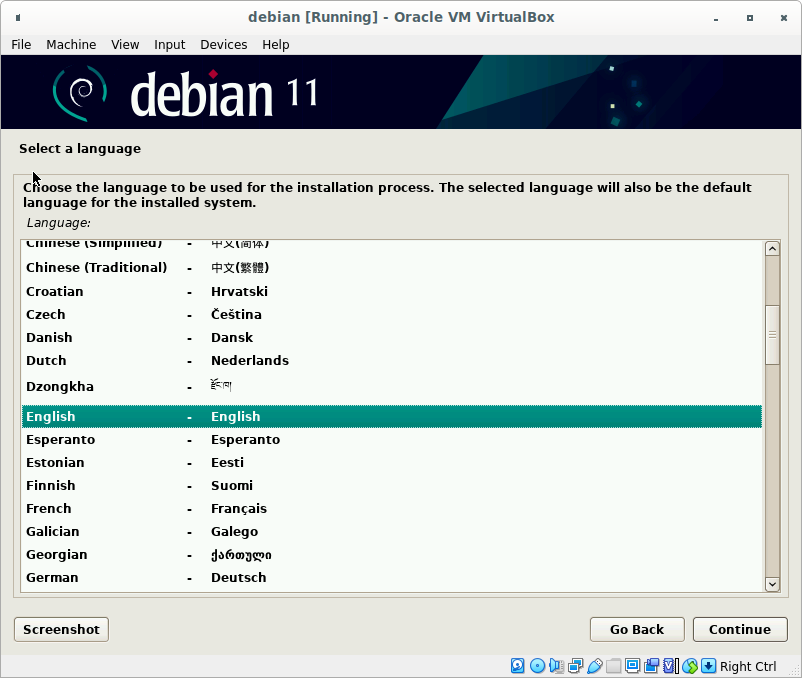
Choose language (recommended language is english)
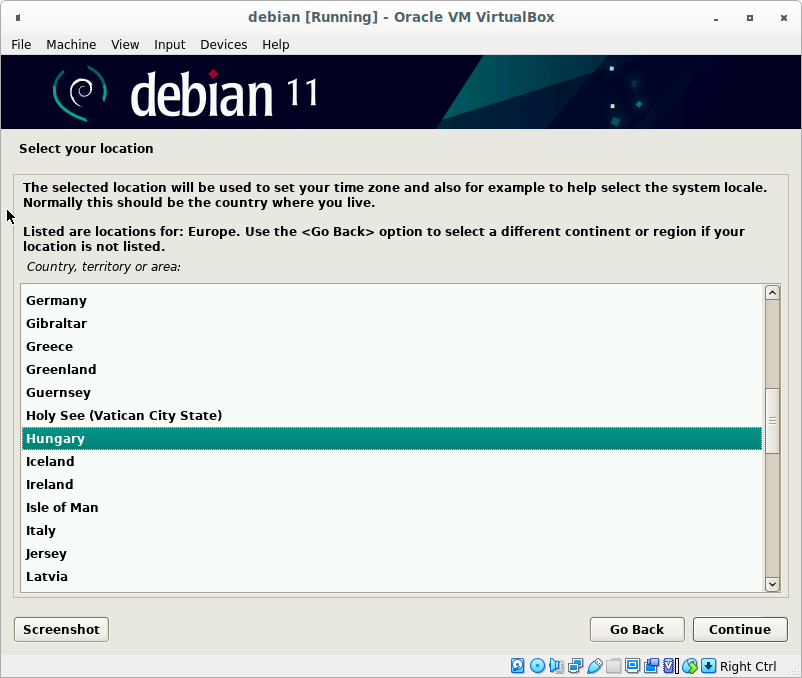
Choose your country
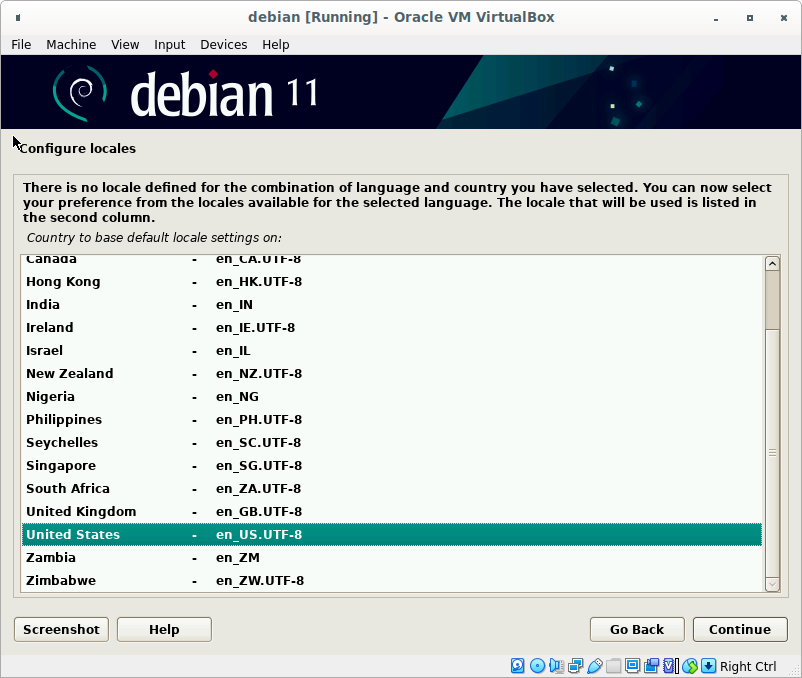
Choose your locale (recommended locale is Unites States en_US.UTF-8)
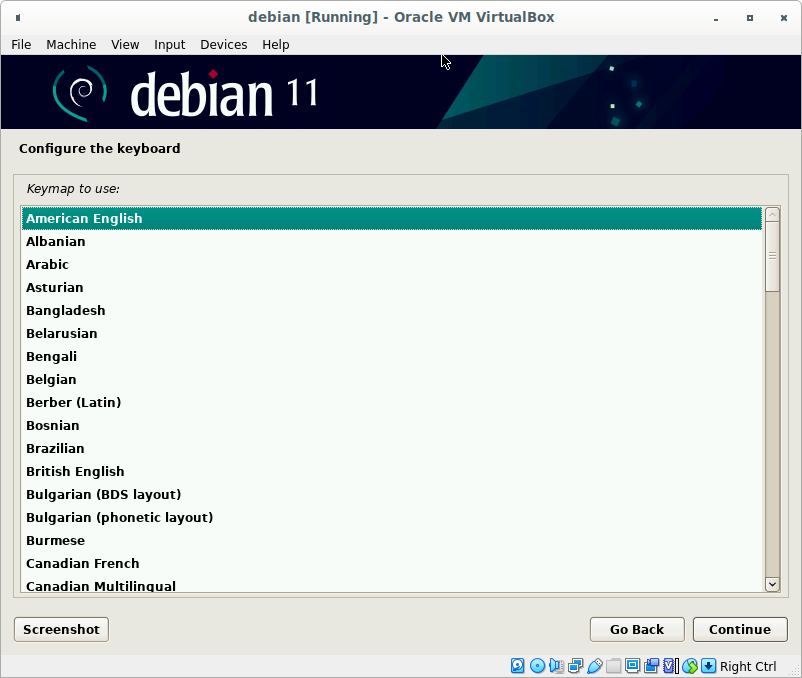
Configure keyboard layout
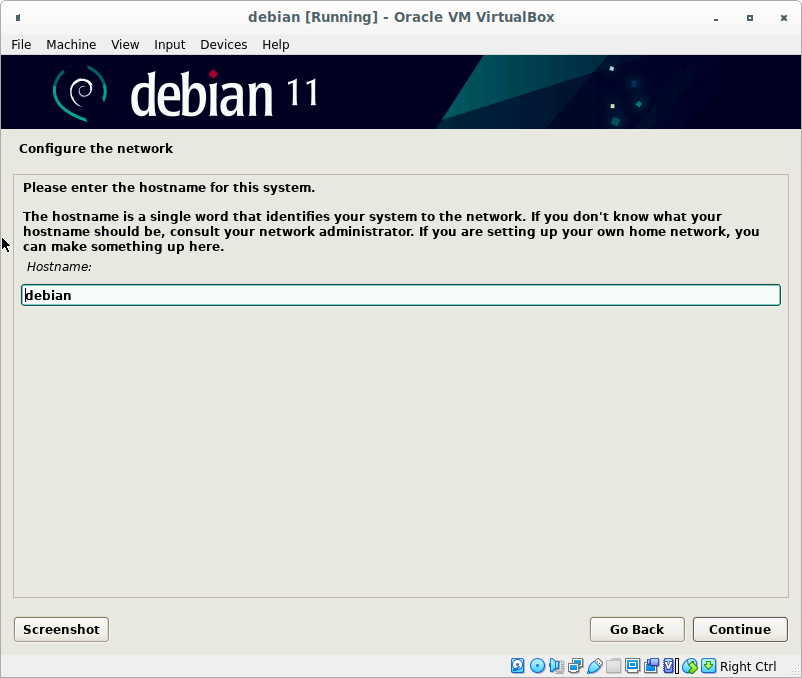
Set hostname of this machine, domain name can be empty
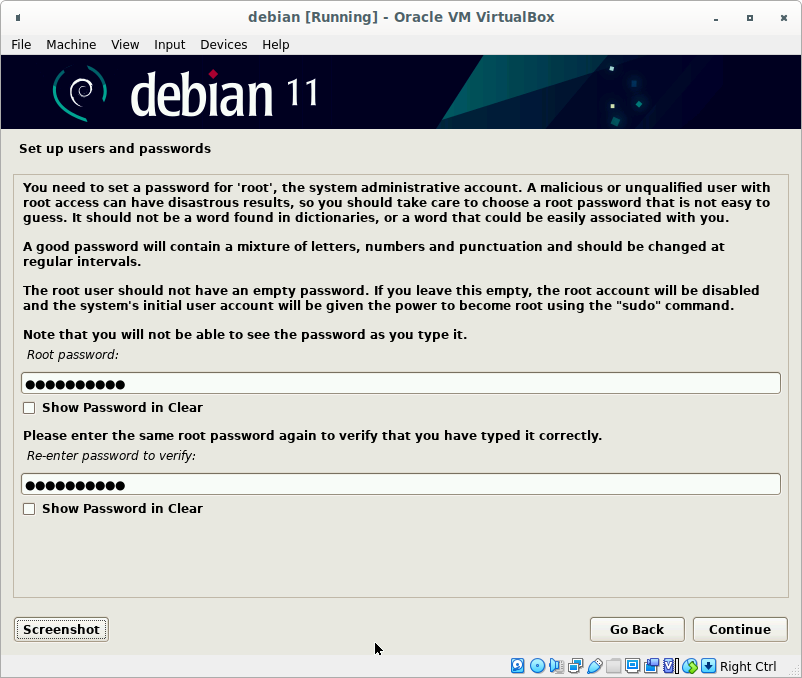
Set the root password twice.
Give a safe password
Create a new user. DO NOT use a linux machine as root!
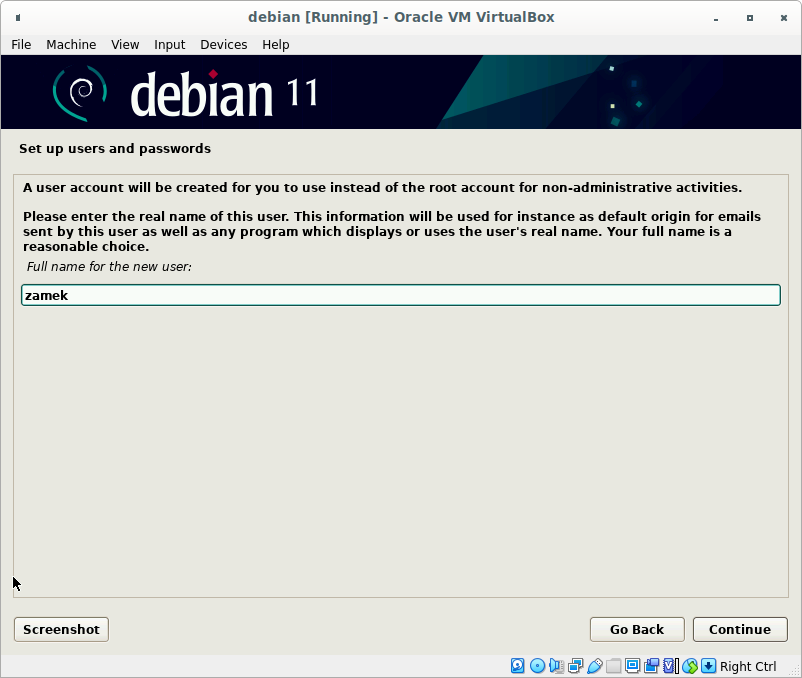
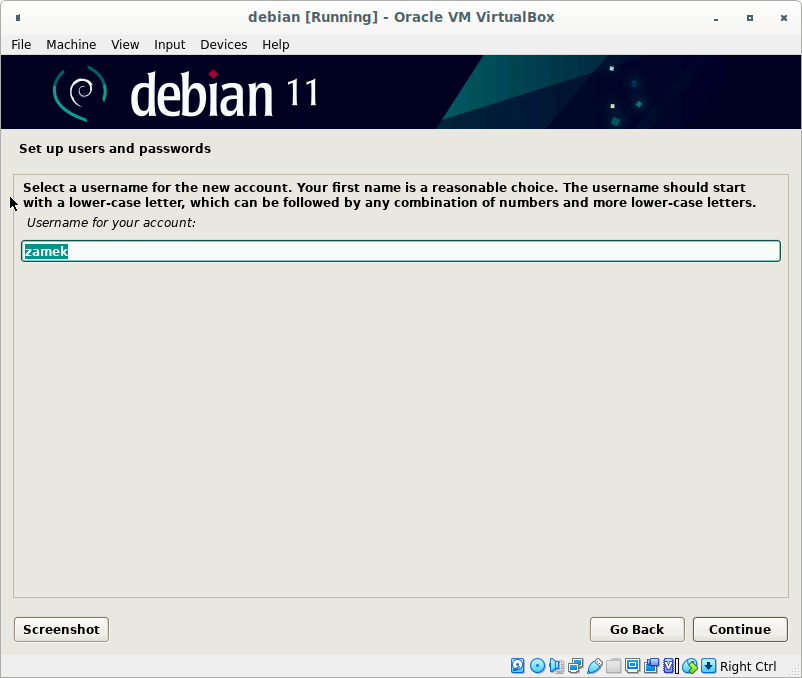
Set the username of this new user.
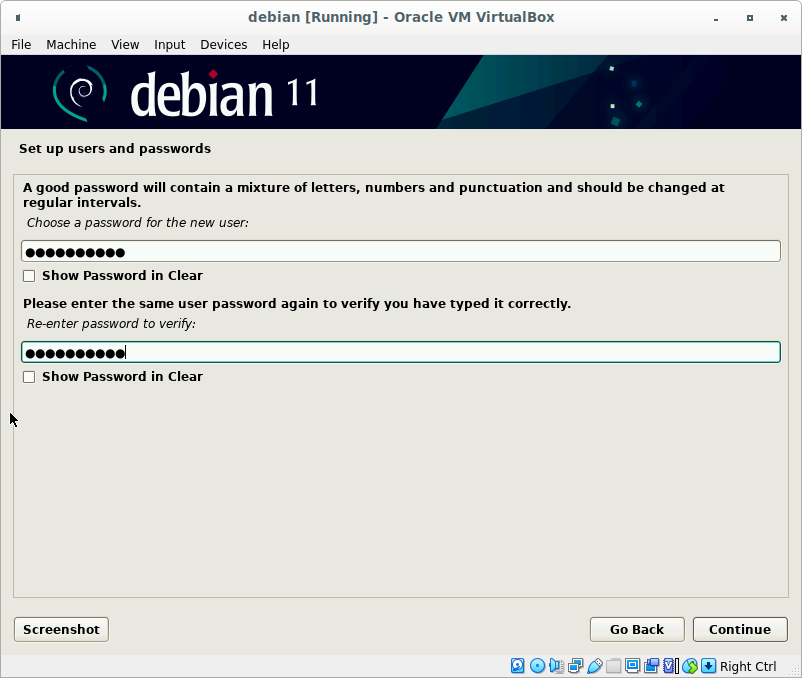
Set the password twice for this user.
Give a safe password
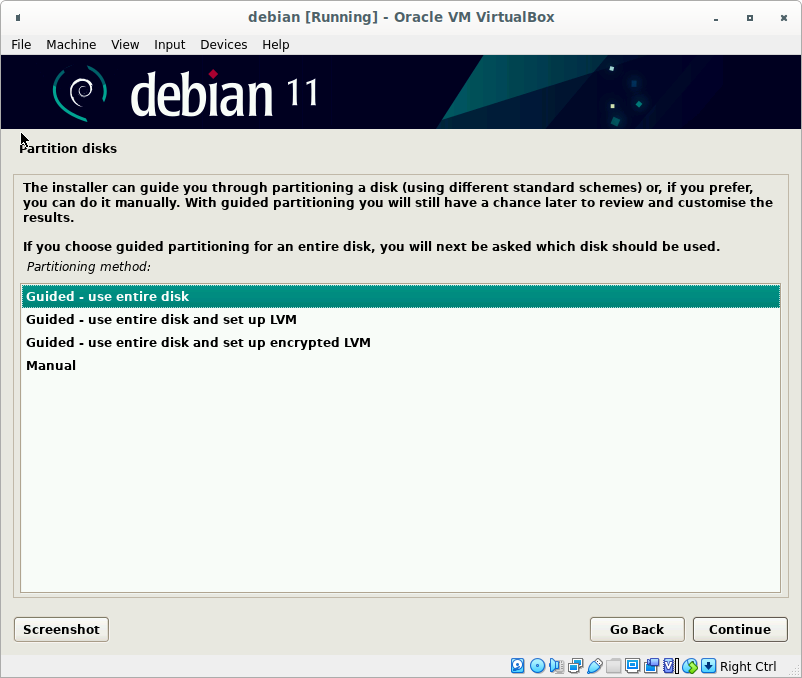
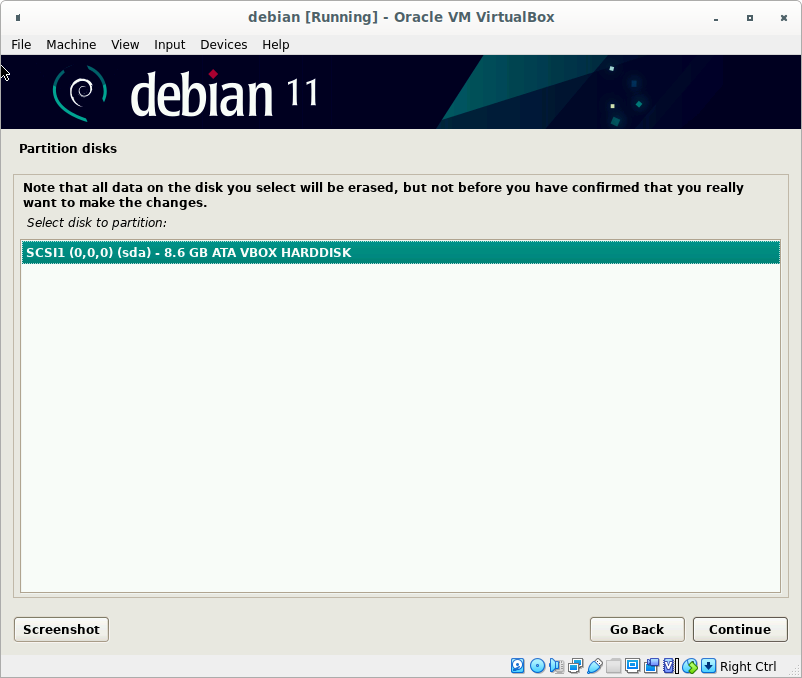
Disk partitioning. Choose Guided - use entire disk
Choose the offered disk
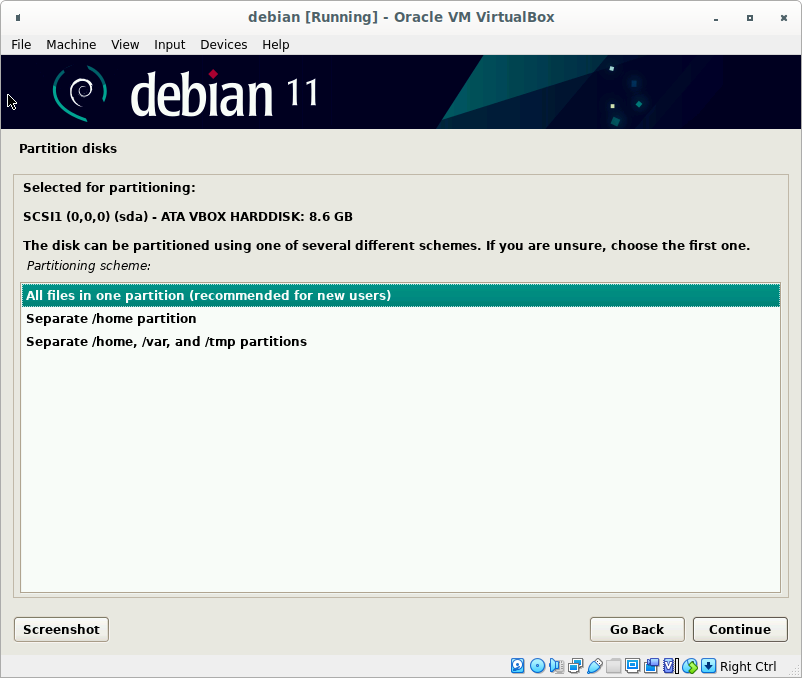
Choose All files in one partition (recommended for new users)
Finish partitioning
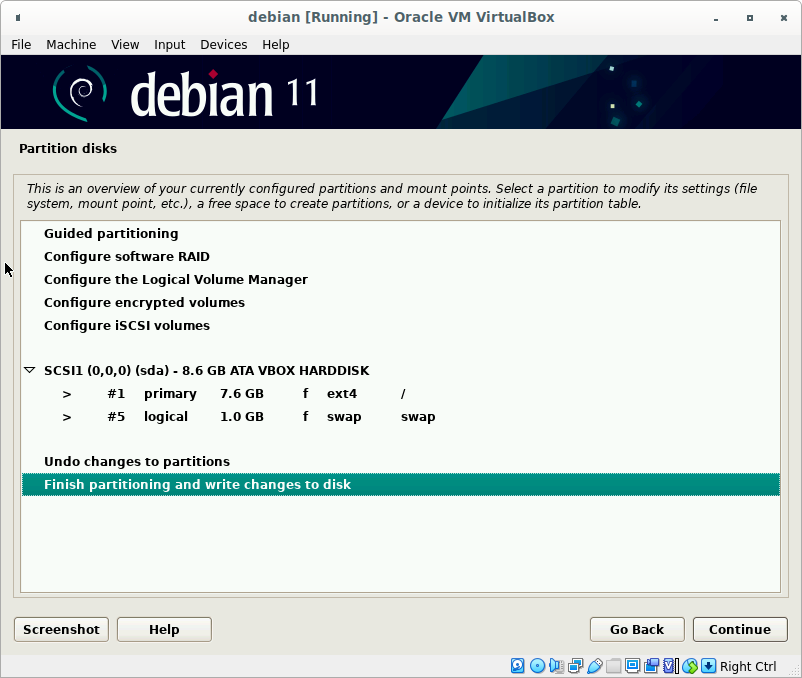
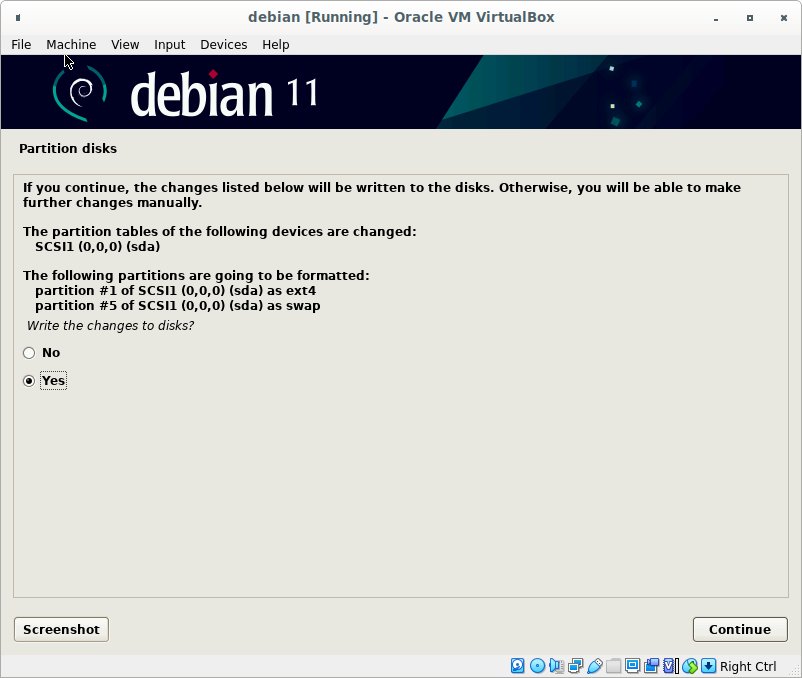
Write changes to disk
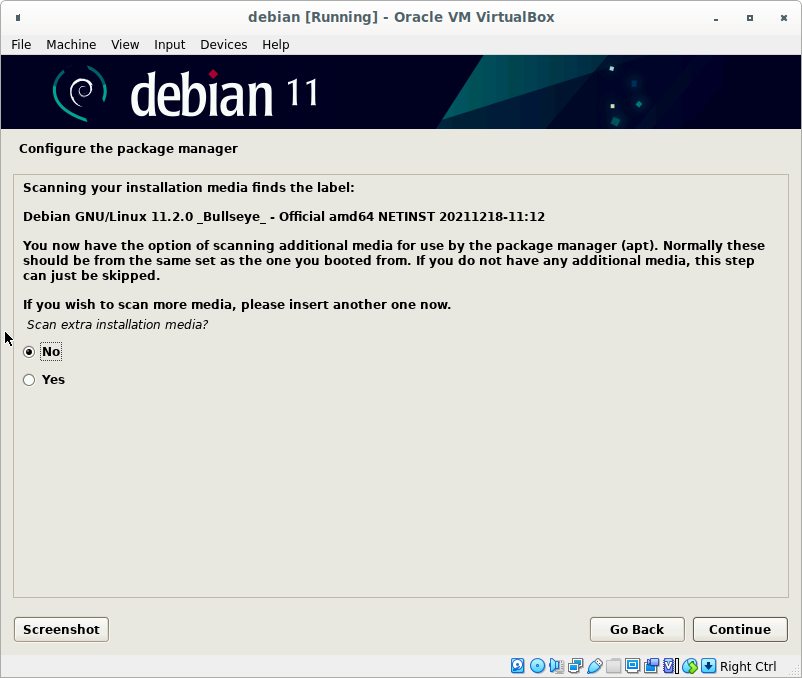
Do not scanning another media
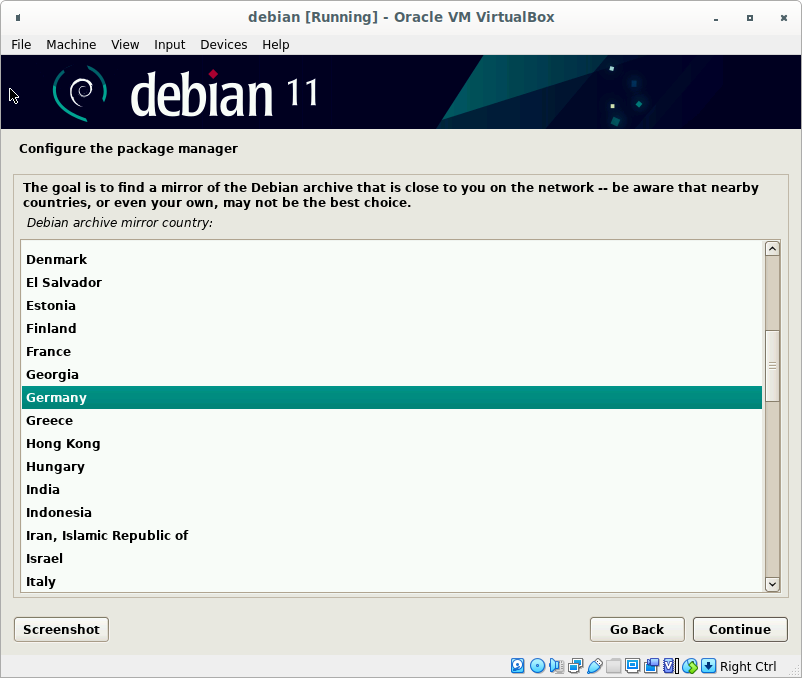
Configure the package manager. Choose German instead of Hungary
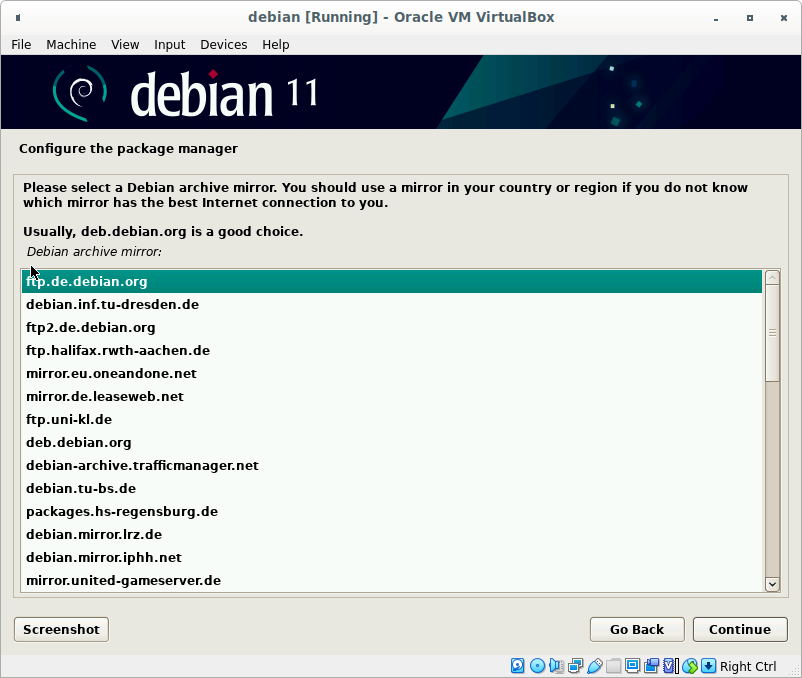
Choose ftp.de.debian.org
Leave the proxy empty

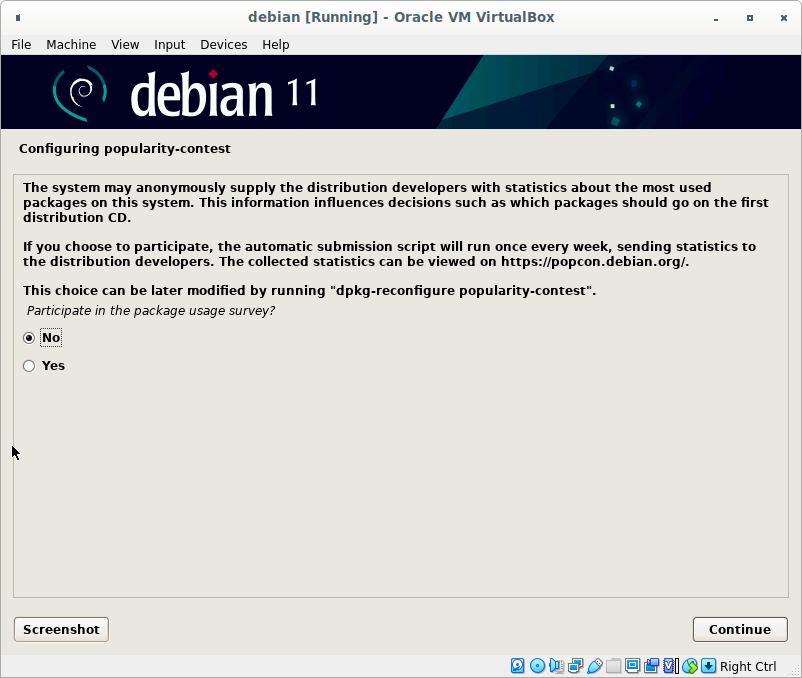
Set the package usage survey as you want
Configure your desktop.
Do not install heavy weight windows managers! Recommendation is LXDE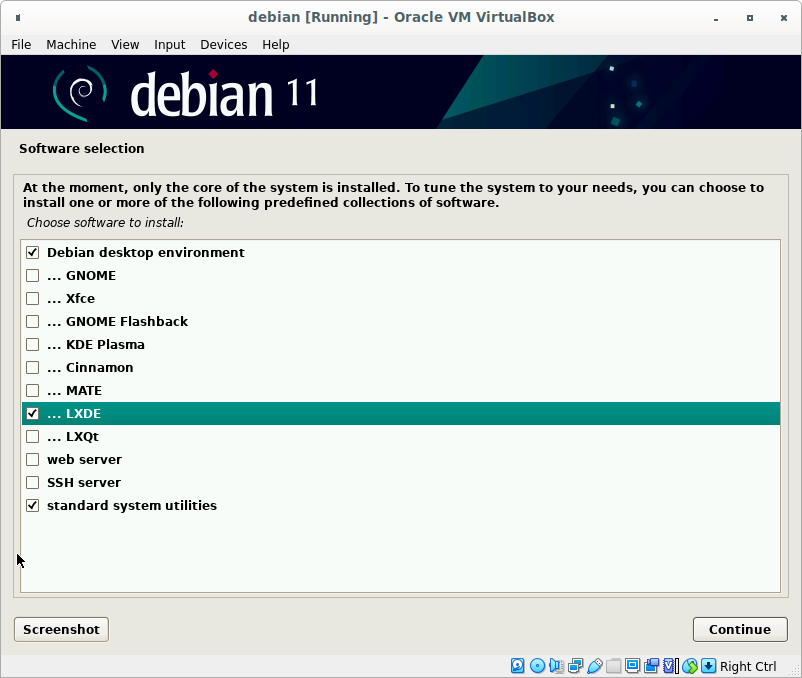
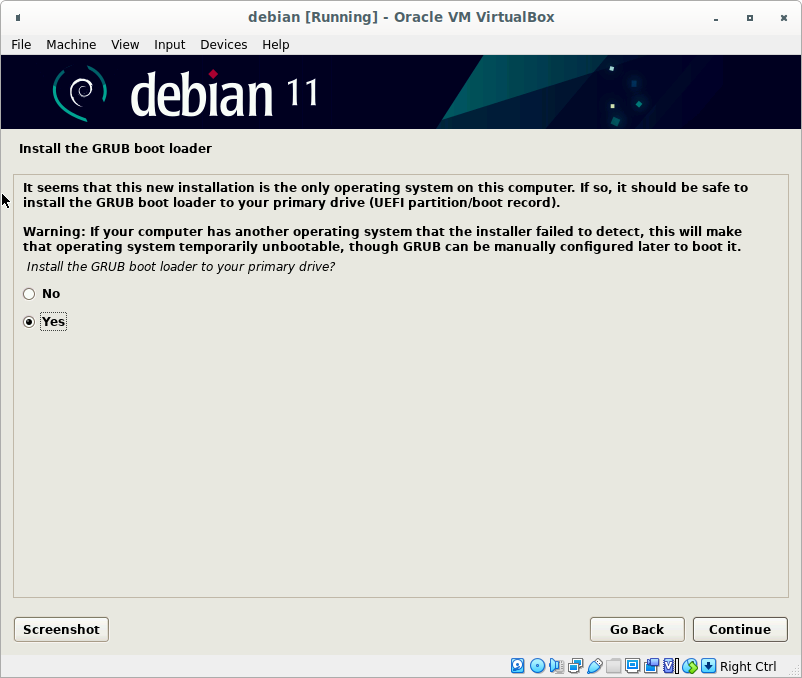
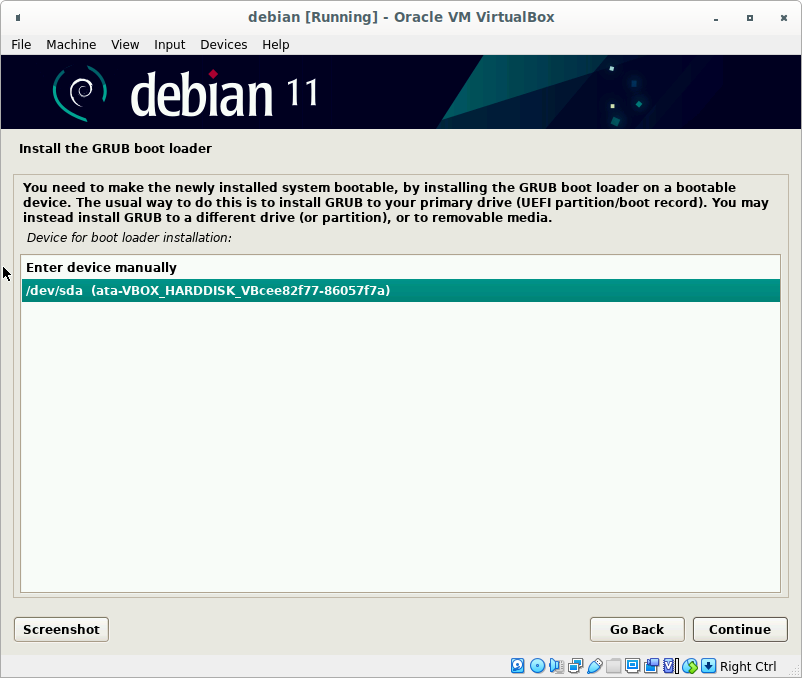
Install GRUB loader
Set GRUB install partition

The Linux command line is a text interface to your computer. Often referred to as the shell, terminal, console, prompt or various other names, it can give the appearance of being complex and confusing to use. Yet the ability to copy and paste commands from a website, combined with the power and flexibility the command line offers. Tutorial
Tab completion is an extremely helpful feature in nearly any command-line environment, whether you’re using the Bash shell on Linux, Command Prompt or PowerShell on Windows, or a terminal window on Mac OS X.
This feature can dramatically help you speed up typing commands. Just hit Tab while typing a command, option, or file name and the shell environment will automatically complete what you’re typing or suggest options to you. Tutorial
dselect is a front-end to dpkg that is used to manage software packages in Debian and Debian-based Linux distributions. You can use dselect to install packages on your system from the APT archives defined in /etc/apt/sources.list, review the already installed packages, uninstall and upgrade packages. dselect has a text-mode user interface that is started with the dselect command:
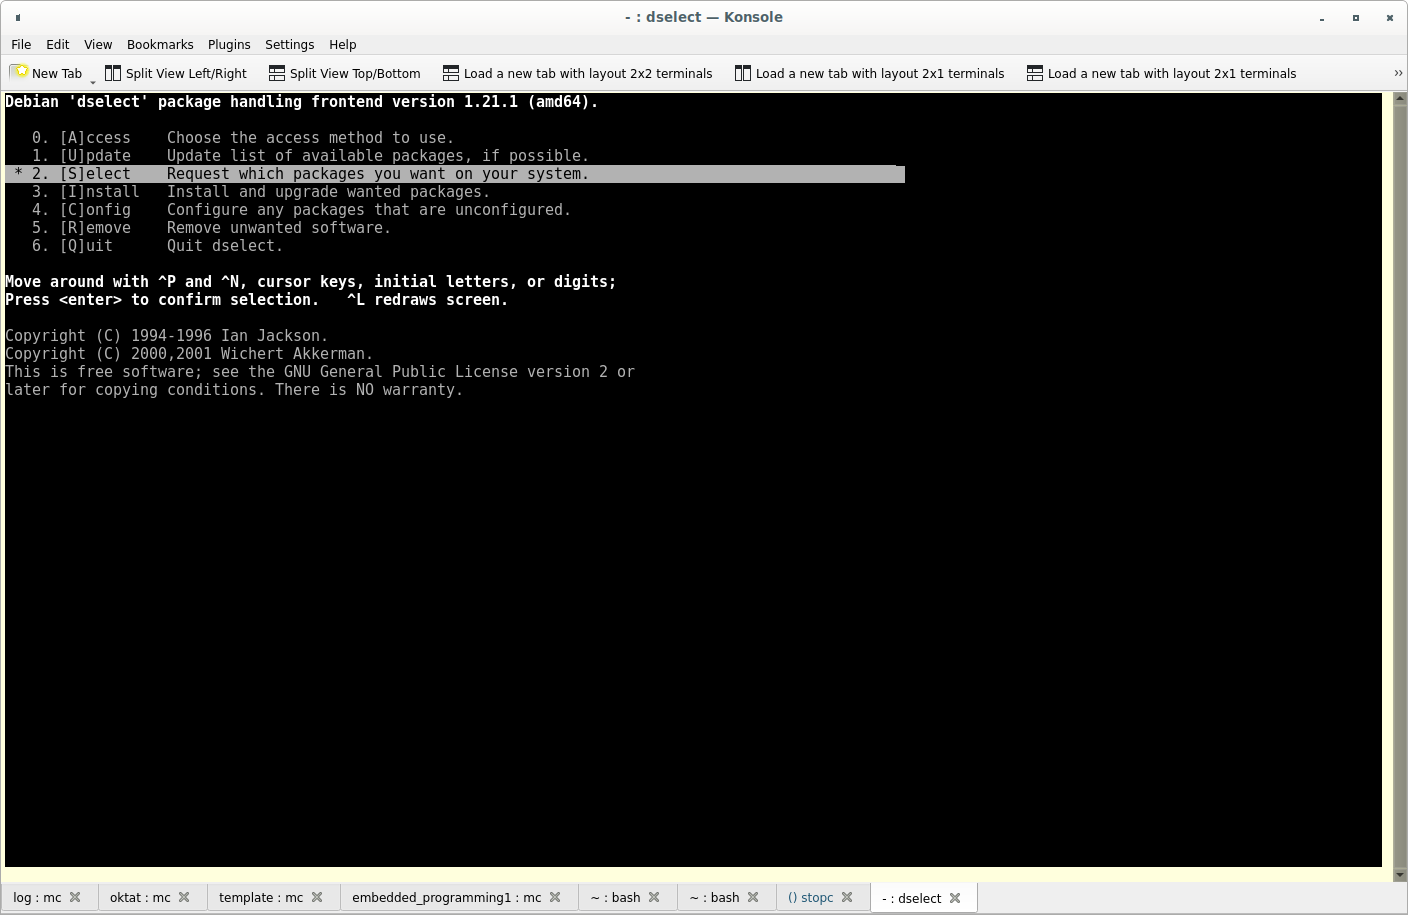
After you start update menu, dselect updates its local database. After that you can start Select menu. You can get help with ? key.
You will be presented with a list of packages which are installed or available for installation. You can navigate around the list using the cursor keys, mark packages for installation (using +) or deinstallation (using -). Packages can be marked either singly or in groups; initially you will see that the line 'All packages' is selected. '+', '-' and so on will affect all the packages described by the highlighted line.
Some of your choices will cause conflicts or dependency problems; you will be given a sub-list of the relevant packages, so that you can solve the problems.
Press space to leave help and enter the list now.
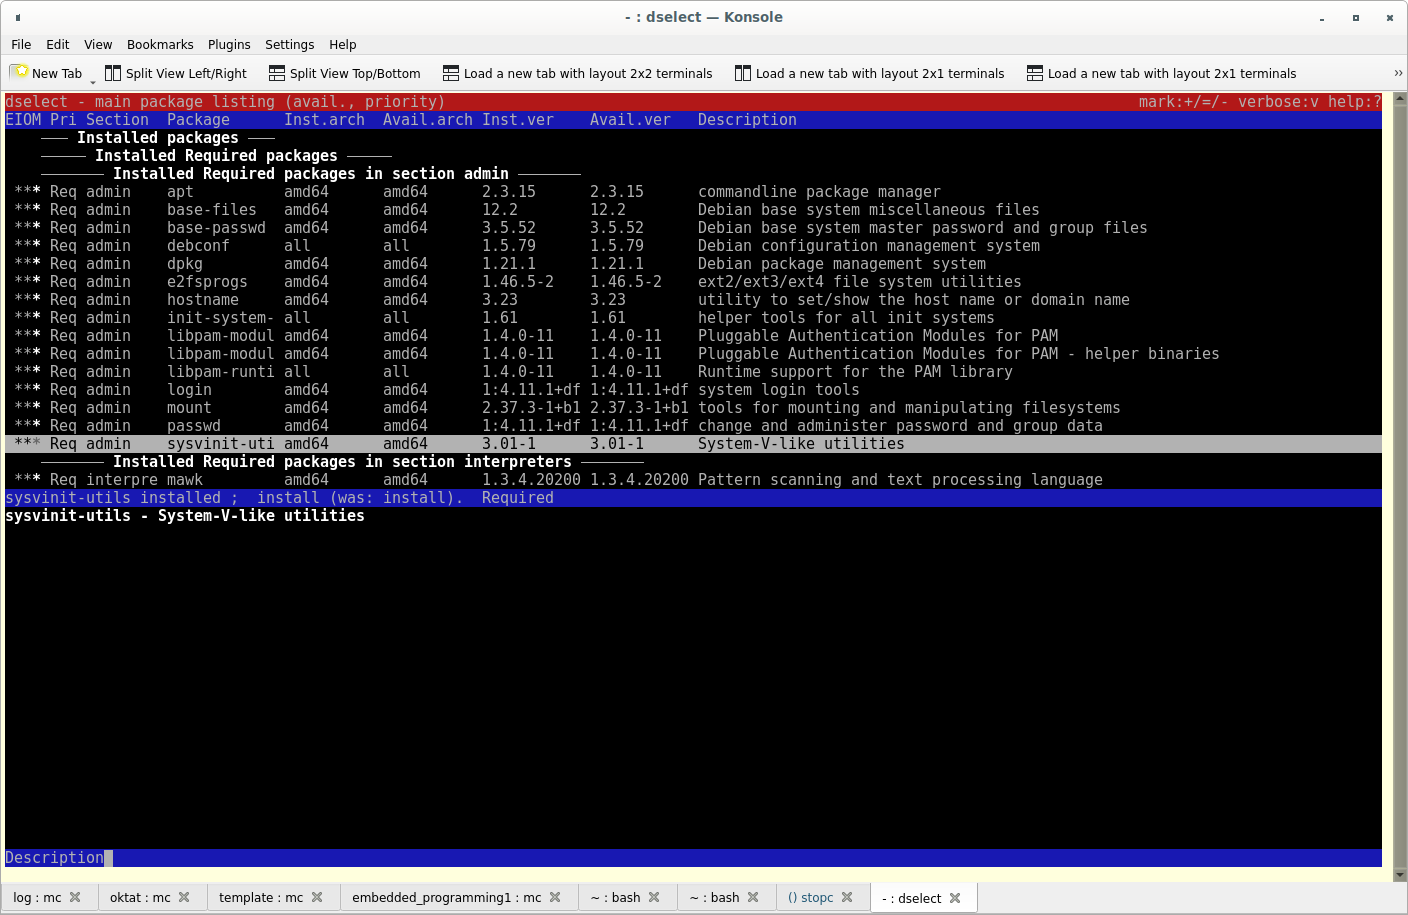
The top half of the screen shows a list of packages. For each package you see four columns for its current status on the system and mark. In terse mode (use v to toggle verbose display) these are single characters, from left to right
Error flag: Space - no error (but package may be in broken state - see below) 'R' - serious error during installation, needs reinstallation;
Installed state:
Old mark: what was requested for this package before presenting this list; Mark: what is requested for this package:
Also displayed are each package's Priority, Section, name, installed and available version numbers (Shft-V to display/hide) and summary description.
Highlight: One line in the package list will be highlighted. It indicates which package(s) will be affected by presses of +, - and _.
The dividing line in the middle of the screen shows a brief explanation of the status of the currently-highlighted package, or a description of which group is highlighted if a group line is. If you don't understand the meaning of some of the status characters displayed, go to the relevant package and look at this divider line, or use the 'v' key for a verbose display (press v again to go back to the terse display).
The bottom of the screen shows more information about the currently-highlighted package (if there is only one).
It can show an extended description of the package, the internal package control details (either for the installed or available version of the package), or information about conflicts and dependencies involving the current package (in conflict/dependency resolution sublists).
Use the i key to cycle through the displays, and I to hide the information display or expand it to use almost all of the screen.
Motion keys: Next/Previous, Top/End, Up/Down, Backwards/Forwards
| j, ↓ | k, ↑ | move highlight |
| N, Pgdn, Space | P, Pgup, Backspace | scroll list by 1 page |
| ^n | ^p | scroll list by 1 line |
| t, Home | e, End | jump to top/end of list |
| u | d | scroll info by 1 page |
| ^u | ^d | scroll info by 1 line |
| B, ← | F, → | pan display by 1/3 screen |
| ^b | ^f | pan display by 1 character |
Mark packages for later processing:
| +, Insert | install or upgrade |
| =, H | hold in present version |
| -, Del | remove |
| :, G | unhold: upgrade or leave uninstalled |
| _ | remove & purge config |
Miscellaneous:
| Quit, exit, overwrite(note capitals!): | Quit |
| ?, F1 | request help (also Help) |
| ReturnConfirm,quit | (check dependencies) |
| i, I | toggle/cycle info displays |
| Q Confirm, quit | (override dependencies) |
| o, O | cycle through sort options |
| X, Esc X | abandoning any changes made |
| v, A, V | change status display opts |
| R | Revert to state before this list |
| ^l | redraw display |
| U | set all to sUggested state |
| / | search (Return to cancel) |
| D | set all to Directly requested state |
| n, \ | repeat last search |
GNU Midnight Commander is a visual file manager, licensed under GNU General Public License and therefore qualifies as Free Software. It's a feature rich full-screen text mode application that allows you to copy, move and delete files and whole directory trees, search for files and run commands in the subshell. Internal viewer and editor are included.
Midnight Commander is based on versatile text interfaces, such as Ncurses or S-Lang, which allows it to work on a regular console, inside an X Window terminal, over SSH connections and all kinds of remote shells.
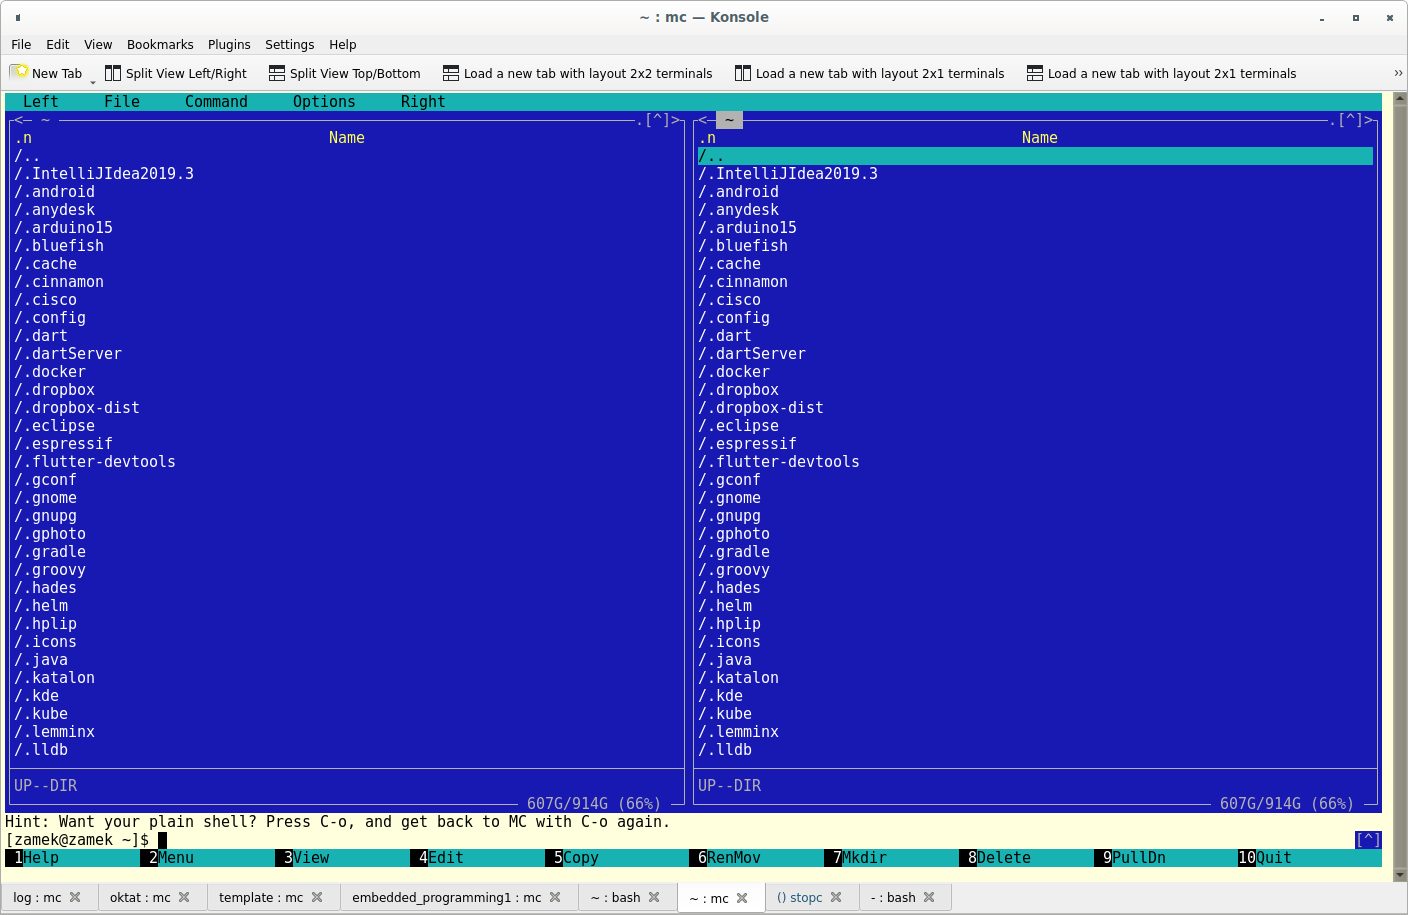
| TAB | Jumps from one panel to the other |
| F1 | Help |
| F2 | Opens user menu |
| F3 | View selected file content |
| F4 | Opens file in internal editor |
| F5 | Copies selected file. Default is to another panel, but it asks first |
| F6 | Moving file. Default is to another panel, but it asks first. |
| F7 | Make directory |
| F8 | Delete file or directory |
| F9 | Opens main menu at the top of the screen |
| F10 | Ends current action; editor, viewer, dialog window or ends mc program |
| ↑ | Move the selection bar to the previous entry in the panel |
| ↓ | Move the selection bar to the next entry in the panel |
| Ctrl+R | Refresh active panel |
| PgUporAlt+V | move the selection bar one page up |
| PgDnorAlt+P | move the selection bar one page down |
| HomeorAlt+< | move the selection bar to the first entry in the panel |
| EndorAlt+> | move the selection bar to the last entry in the panel |
| Alt+G | move the selection bar to the first visible entry in the panel |
| Alt+R | move the selection bar to the middle visible entry in the panel |
| Alt+J | move the selection bar to the last visible entry in the panel |
| Alt+S | start a quick filename search in the directory listing |
| Alt+E | change charset of current panel |
| Alt+H | show the directory history |
| Alt+U | move to the next directory in the history |
| Alt+Y | move to the previous directory in the history |
| + | select (tag) a group of files |
| \ | unselect a group of files |
| Alt+* | invert selection on the current panel |
| Alt+I | make the current directory of the current panel also the current directory of the other panel |
| Alt+O | If the currently selected file is a directory, load that directory on the other panel and moves the selection to the next file. If the currently selected file is not a directory, load the parent directory on the other panel and moves the selection to the next file |
| Alt+L | If the currently selected file is a link to the directory, load that directory on the other panel and moves the selection to the next file |
| Ctrl+PgDn | move to the child directory |
| Ctrl+PgUp | move to the parent directory |
| Insert or Ctrl+T | tag or untag files. To untag files, just retag a tagged file |
| Shft+↓ | tag file and move the selection bar to the next entry |
| Shft+↑ | tag file and move the selection bar to the previous entry |
| Alt+Enter | Copies selected filename in command line |
| Ctrl+Shft+Enter | Copies full path of selected file in the command line |
| Alt+H | Shows command line history |
| Ctrl+X then c | Opens chmod dialog for marked file |
| Ctrl+X then o | Opens chown dialog for marked file |
| Alt+? | Opens search dialog |
| Ctrl+X then A | Opens VFS list. If an ftp session times out, you can use this to free the open vfs so you can log in again. |
| F3 | Begin of text selection. Second press - end of text selection |
| Shft+F3 | Begin of block text selection |
| F5 | Copy text selection |
| F6 | Move text selection |
| F8 | Delete text selection |
| Alt+i | Go to previous bookmark |
| Alt+j | Go to next bookmark |
| Alt+k | Toggle bookmark |
| Alt+l | Go to line by number |
| Alt+o | Flush bookmarks |
| Alt+q | Insert literal. See table at bottom of this page |
| Alt+t | Sort of text in selection. |
| Alt+u | Execute external command and insert output into cursor position |
| Ctrl+f | Save selection into external file |
| Ctrl+k | Delete chars to end of line |
| Ctrl+n | Create new file |
| Ctrl+s | Toggle syntax highlighting |
| Ctrl+t | Select text charset |
| Ctrl+u | Undo |
| Ctrl+x | Go to end of next word |
| Ctrl+y | Delete line |
| Ctrl+z | Go to start of previous word |
| Shft+F5 | Insert external file content into cursor position |
| Alt+Enter | Codejump dialog |
| Alt+- | Move back into codejump (go to from function definition to function call) |
| Alt++ | Move forvard into codejump (go to from function call to function definition) |
| Alt+n | Toggle number of lines |
| tab | If 'persistent blocks' option is on, then move selected text to right |
| Alt+tab | If 'persistent blocks' option is on, then move selected text to left |
| Shft+Arrows | Text selection |
| Alt+Arrows | Block text selection |
| Alt+Shft+- | Toggle show visible tabs and trailing spaces |

apt-get install git gitg gitk git-flow
git clone ssh://user@domain.com/repo.git
git init
git status
git diff
git add .
git add -p <file>
git commit -a
git commit --amend
git branch
git checkout <branch>
git branch <new-branch>
git checkout --track <remote/branch>
git branch -d <branch>
git tag <tag-name>
git remote -v
git remote show <remote>
git remote add <remote> <url>
git fetch <remote>
git pull <remote> <branch>
git push <remote> <branch>
git branch -dr <remote/branch>
git push --tags
git merge <branch>
git rebase <branch>
git rebase --abort
git rebase --continue
git mergetool
git add <resolved-file>
git rm <resolved-file>
git reset --hard HEAD
git checkout <file>
git revert <commit>
git reset --hard <commit>
git reset <commit>
git reset --kepp <commit>
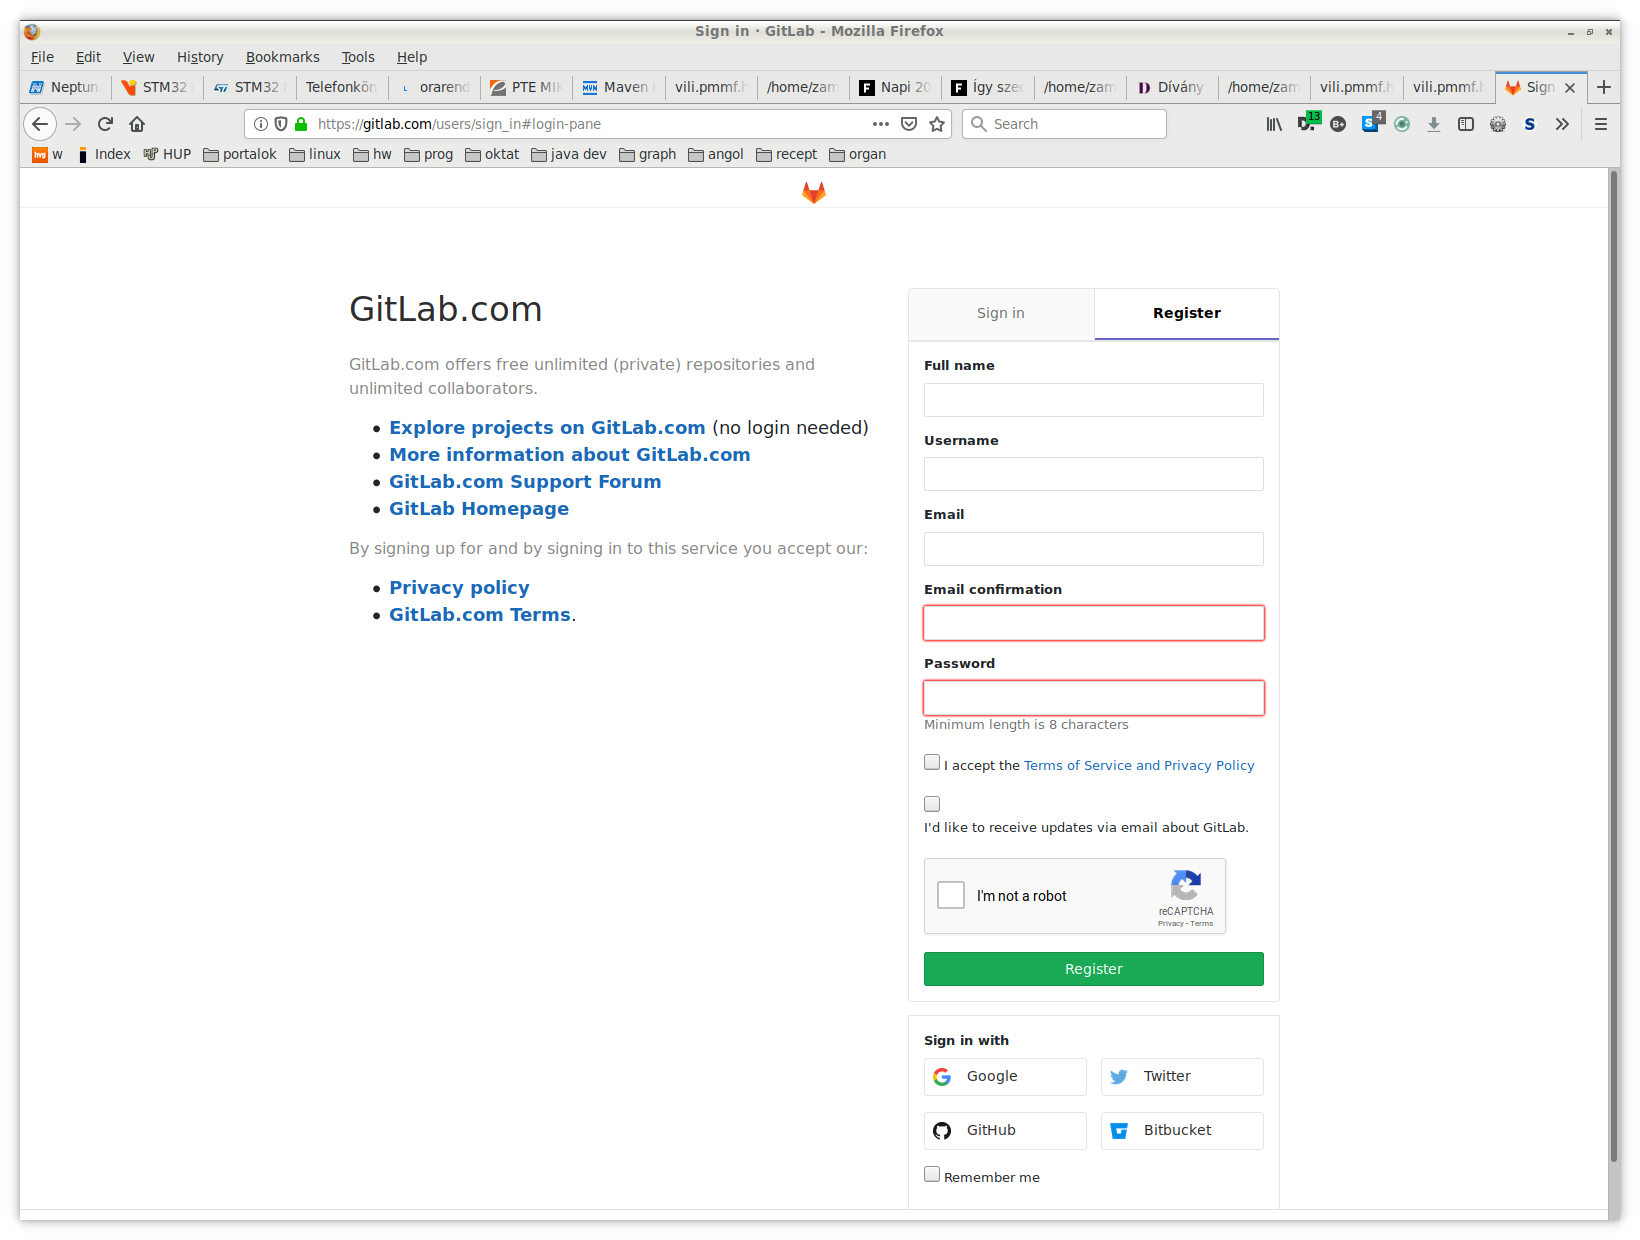
Go to Gitlab
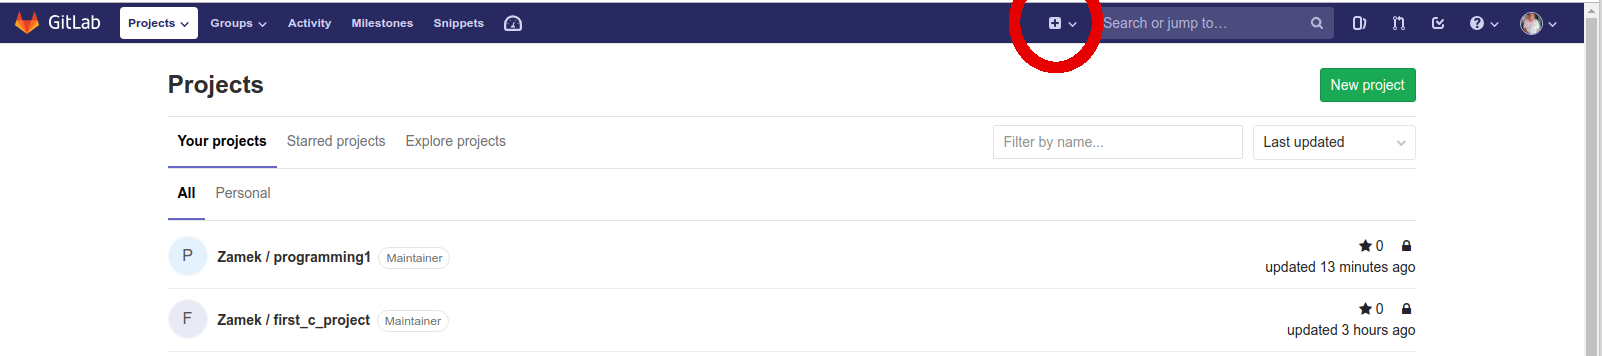
git remote add origin http://gitlab.com/<username>/<projectname>
git add --all
git commit -am "commit message"
git push origin master
git fetch origin master
git pull origin master
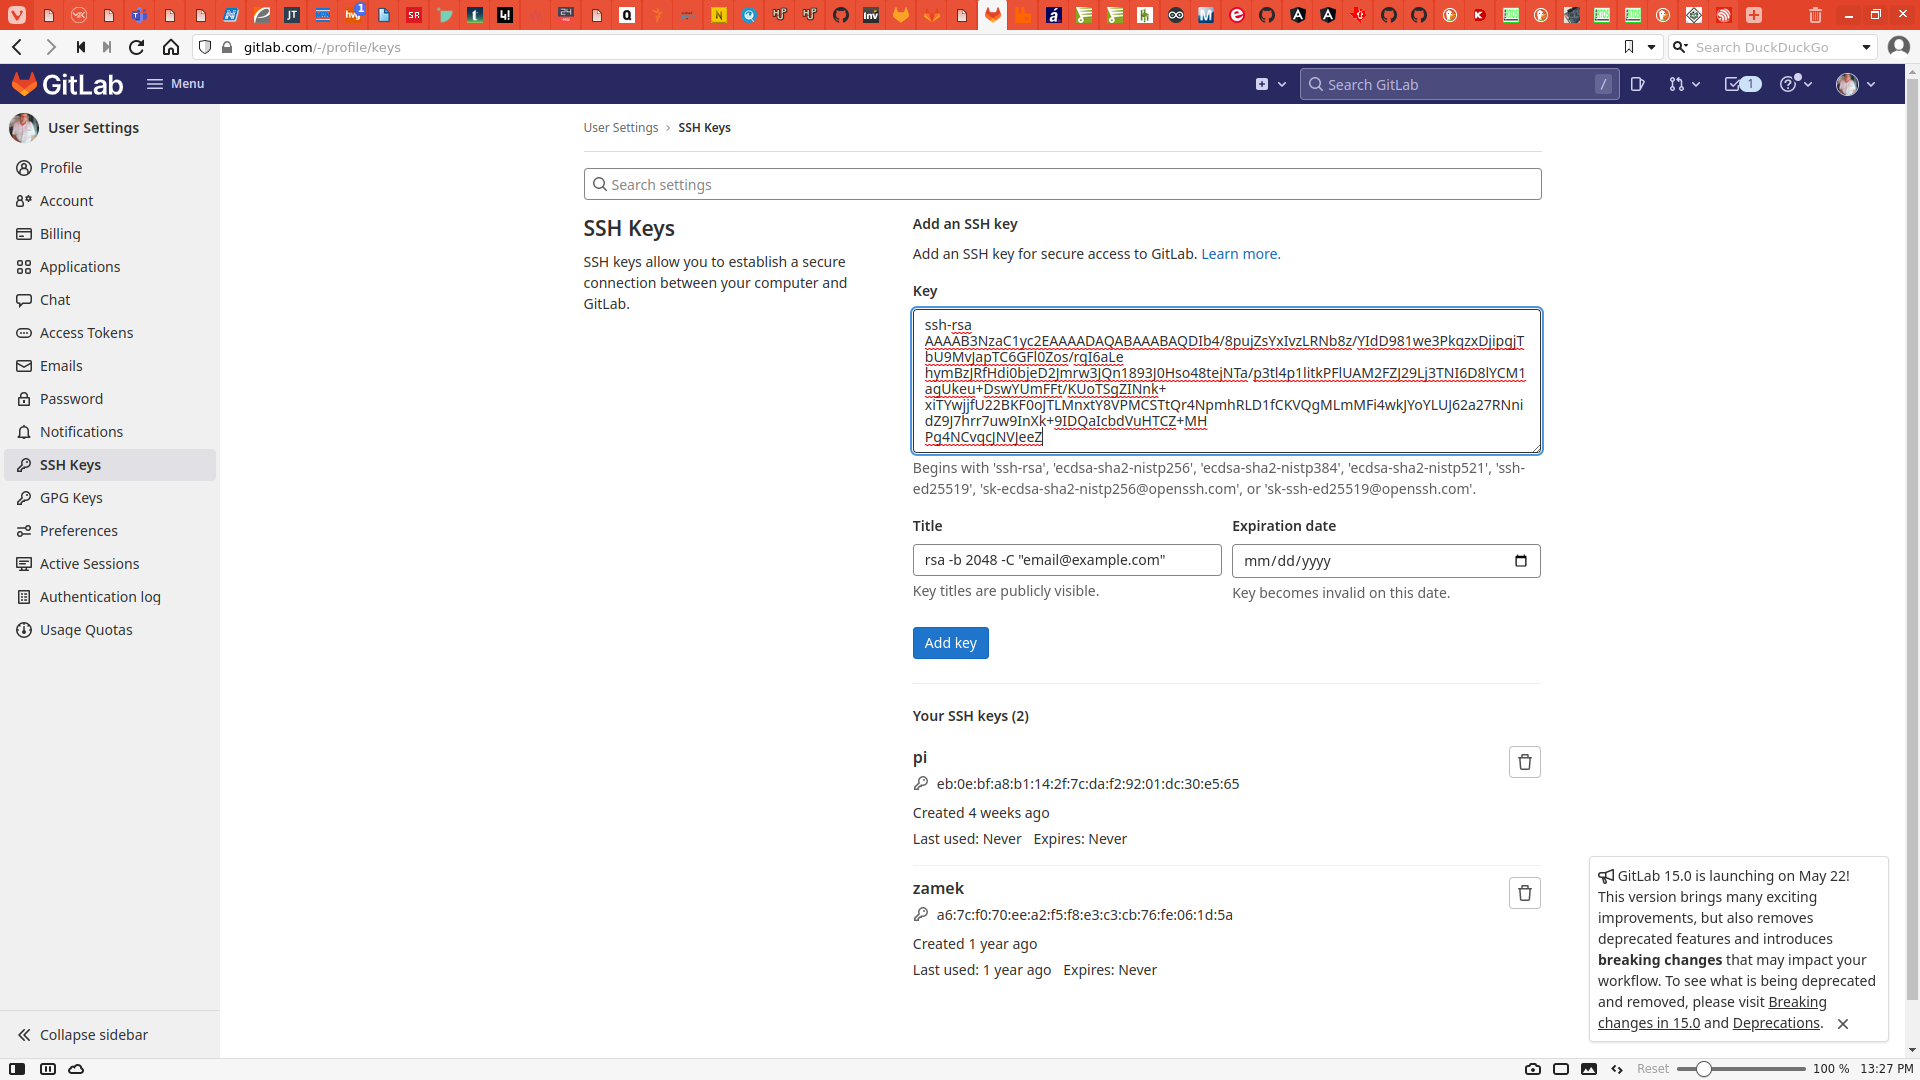
ssh-keygen -t rsa -b 2048
Do NOT add a password when generator ask you! (simple enter)
default place of your public key is at ~/.ssh/id_rsa.pub.
open this file with an editor and copy the whole content to clipboard
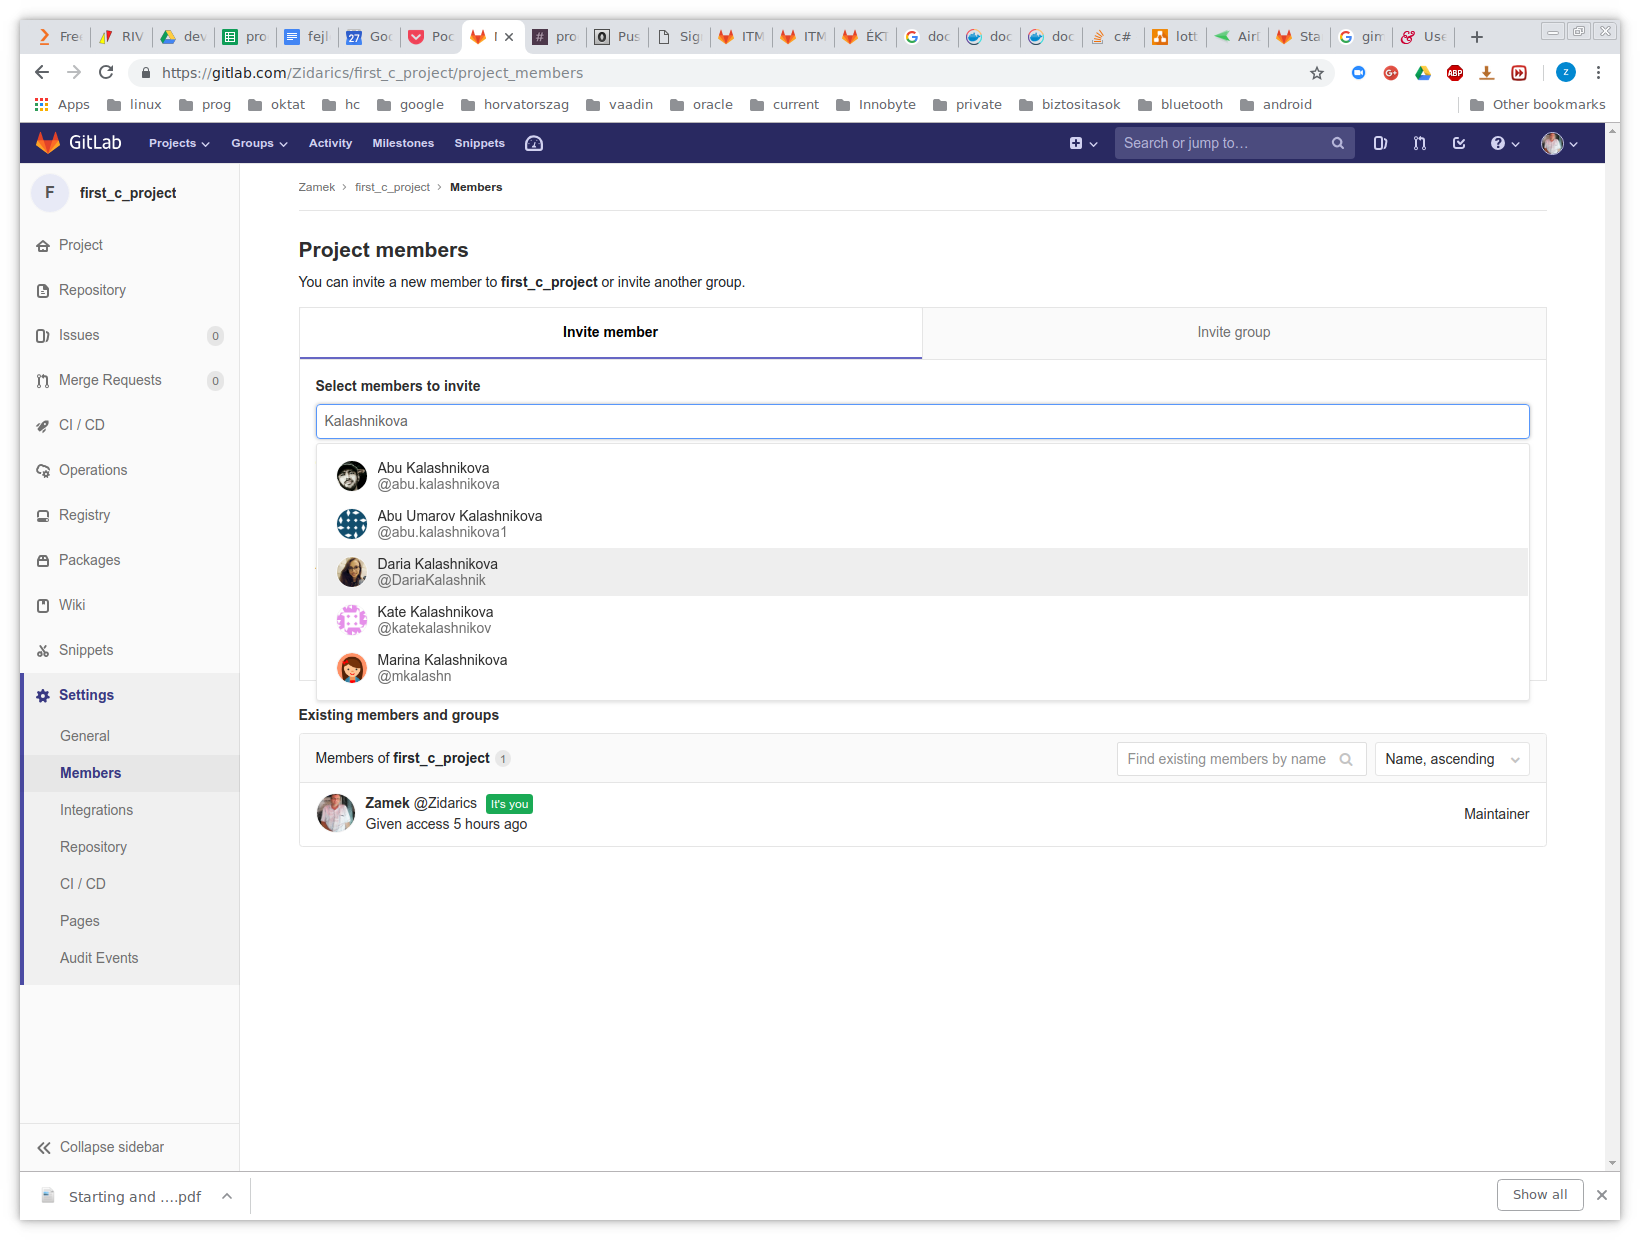
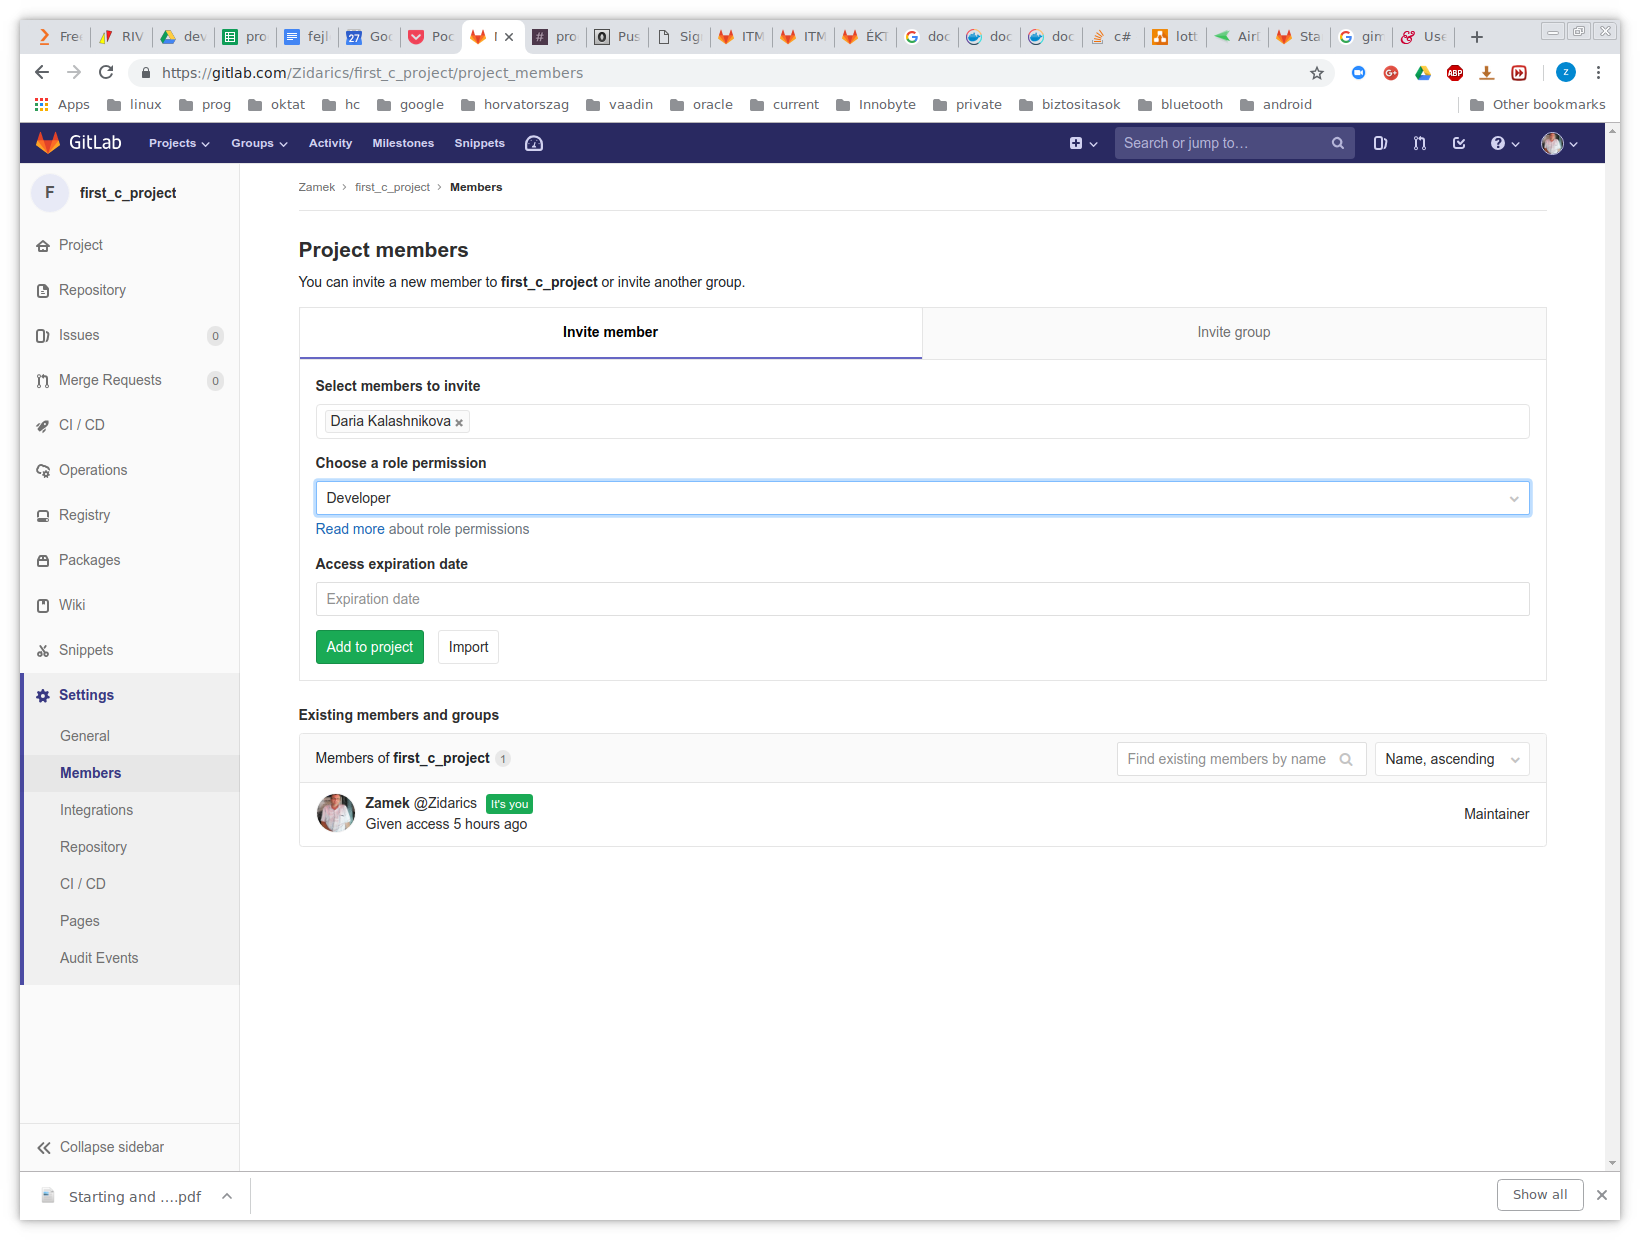
open gitlab with a browser & click to personal data in the top right corner & click to preferences menu
Click to SSH Keys menu
copy the whole content of your id_rsa.pub to Key field
Your original repository url is: https://gitlab.com/<your_username>/<project_name>.git
Converted url is git@gitlab.com:<your_username>/<project_name>.git
Original repository: https://gitlab.com/Zidarics/zidarics_emb1.git
Converted repository: git@gitlab.com/Zidarics/zidarics_emb1.git
apt-get install libcunit libcunit-dev libcunit-doc libcunit-dev-curses-dev
apt-get install libmocka0 cmocka-doc libmocka-dev